Author: admin

  • Best Dog Breeds for First-Time Owners in the US

    Best Dog Breeds for First-Time Owners in the US

    Choosing your first dog is one of the most exciting — and consequential — decisions you’ll make. The right breed for a first-time owner isn’t the most popular or cutest puppy. It’s the dog whose energy, training needs, and temperament fit your actual life. This guide profiles 12 breeds that do well with beginners, with honest notes on what each needs. Once you’ve picked a breed, our new puppy checklist covers everything to prepare before bringing your puppy home.

    What Makes a Breed Good for Beginners?

    • Trainability: Eager-to-please breeds that respond to positive reinforcement.
    • Forgiving temperament: Tolerates rookie mistakes without behavior problems.
    • Moderate energy: Satisfied with daily walks rather than marathon exercise.
    • Manageable grooming: Low-to-moderate needs while you’re learning.

    The 12 Best Breeds for First-Time Owners

    1. Labrador Retriever

    Temperament: Cheerful, social, great with kids. Exercise: High — 1–2 hours daily. Grooming: Low; heavy seasonal shedding. Watch for: Prone to obesity; hip issues.

    2. Golden Retriever

    Temperament: Gentle, patient, devoted. Exercise: High — 1–2 hours daily. Grooming: Moderate-high; brush 2–3x weekly. Watch for: High cancer rates; skin allergies.

    3. Cavalier King Charles Spaniel

    Temperament: Sweet, gentle, adaptable. Exercise: Moderate — 30–60 min daily. Grooming: Moderate. Best for: Apartments, seniors. Watch for: Heart issues (mitral valve disease).

    4. Poodle (Miniature or Standard)

    Temperament: Among the smartest breeds; learns fast. Exercise: Moderate-high. Grooming: High — professional grooming every 6–8 weeks. Best for: Allergy sufferers; people who enjoy training.

    5. Shih Tzu

    Temperament: Affectionate, charming. Exercise: Low-moderate. Grooming: High in full coat; easier with puppy cut. Best for: Apartments, less active owners.

    6. Beagle

    Temperament: Merry, curious, great with kids. Exercise: Moderate-high — 1+ hours daily. Grooming: Low. Watch for: Vocal (baying); strong prey drive; prone to overeating.

    7. Boxer

    Temperament: Playful, loyal, great with children. Exercise: High — 1.5+ hours vigorous daily. Grooming: Low. Watch for: High cancer risk; jumpy — training essential.

    8. Bichon Frise

    Temperament: Cheerful, gentle, hypoallergenic. Exercise: Moderate — 30–60 min daily. Grooming: High — daily brushing, grooming every 4–6 weeks. Watch for: Separation anxiety.

    9. Cocker Spaniel

    Temperament: Sweet, eager to please. Exercise: Moderate — ~1 hour daily. Grooming: Moderate-high; ears need regular cleaning. Watch for: Ear infections common.

    10. Papillon

    Temperament: Bright, trainable, sturdy for a toy breed. Exercise: Moderate. Grooming: Low-moderate. Best for: Apartments; owners wanting a smart small dog.

    11. Bernese Mountain Dog

    Temperament: Calm, affectionate gentle giant. Exercise: Moderate. Grooming: Moderate-high; heavy shedding. Watch for: Short lifespan (6–8 years); overheats easily.

    12. Mixed Breed / Rescue Dog

    A well-chosen adult rescue can be the perfect first dog — adult size, energy, and temperament are already apparent. Shelter staff can match you to your lifestyle. Many rescues offer trial foster periods.

    Breeds First-Timers Should Think Twice About

    • Border Collie, Australian Shepherd, Belgian Malinois: Need intense daily work; invent destructive “jobs” when bored.
    • Chow Chow, Akita: Strong-willed guardians needing experienced handling.
    • Siberian Husky: Escape artists with marathon energy needs.

    5 Questions Before You Commit

    1. How many hours am I home? Puppies need midday breaks.
    2. What’s my real activity level? Be honest.
    3. Can I afford it? Budget $1,500–$3,000+/year plus emergency savings. Food is a major ongoing cost — learn how to choose the right dog food for complete nutrition.
    4. Does my housing allow dogs? Check restrictions first.
    5. Am I ready for 10–15 years? It’s a decade-plus commitment.

    Conclusion

    The best first dog is the one whose needs match your life. Do your honest self-assessment, meet several dogs, and prioritize temperament and lifestyle fit over looks.

    Disclaimer: This article is for general informational purposes only. Consult your veterinarian about health and consider a certified professional trainer for behavior concerns.
  • How to Groom Your Cat at Home: Brushing, Nails, and Bathing

    How to Groom Your Cat at Home: Brushing, Nails, and Bathing

    Cats spend 3–5 hours a day grooming themselves — so do they need our help? Absolutely. Regular home grooming prevents painful matting, reduces hairballs, keeps nails from growing into paw pads, and lets you spot skin problems early. This guide covers brushing, nail trimming, and bathing, plus techniques for difficult cats. Grooming is only half of keeping a cat clean — pair it with our cat litter box training guide for new cat owners to keep the litter box as fresh as the coat.

    Essential Grooming Tools

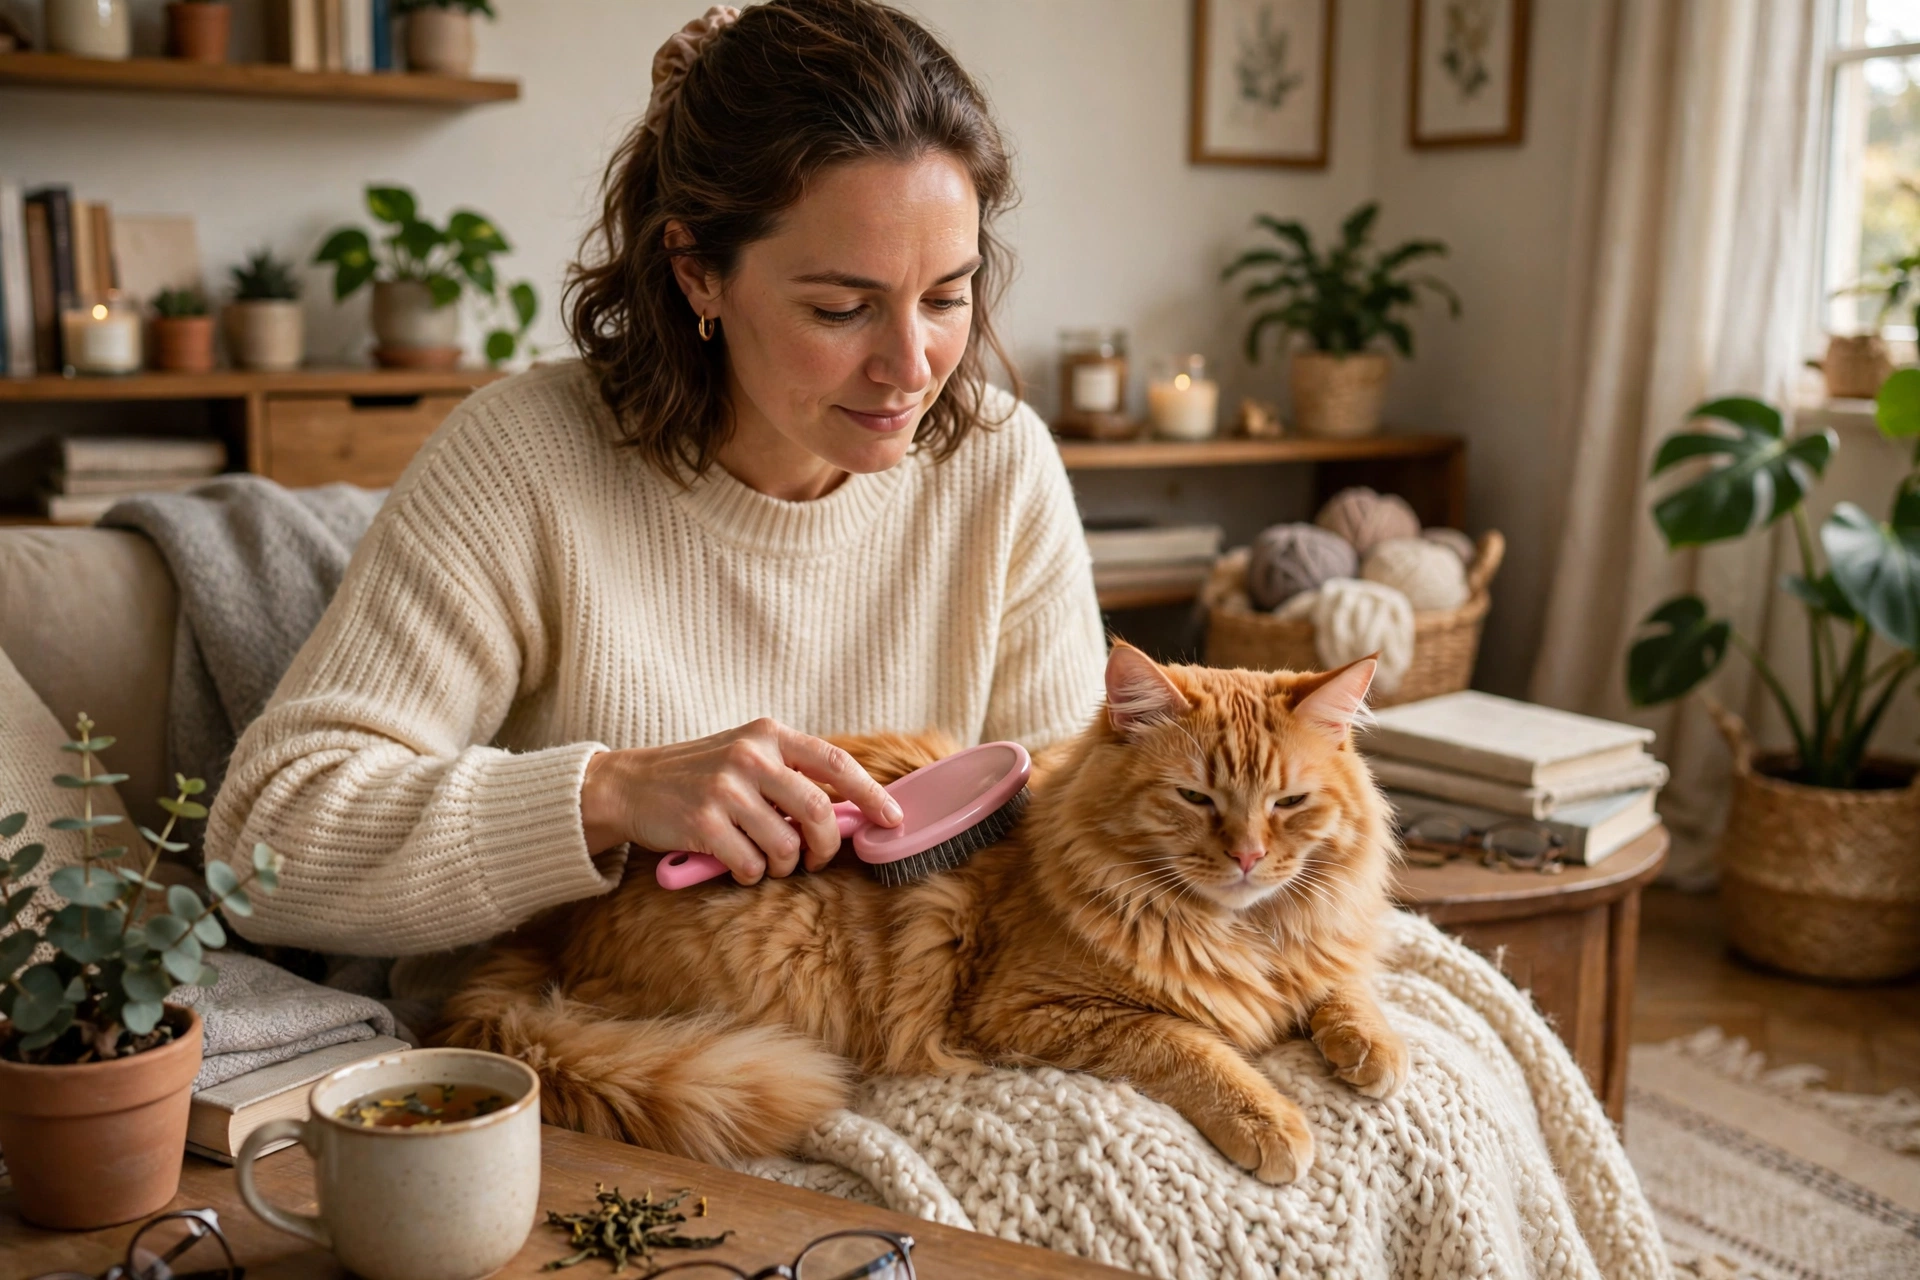
    • Slicker brush: Removes loose fur and light tangles.
    • Steel comb: Essential for long-haired cats — finds tangles the brush misses.
    • Cat nail clippers + styptic powder (for nicks).
    • Cat-safe shampoo only — never human or dog shampoo (some dog products contain permethrin, toxic to cats).
    • Treats: The most important “tool” — turn grooming into a reward session.

    Brushing: Technique and Frequency

    • Short-haired: Once a week (2–3x during shedding season).
    • Medium-haired: 2–3 times per week.
    • Long-haired: Daily — non-negotiable.
    1. Start when calm — after a meal or nap. Let your cat sniff the brush first.
    2. Brush in the direction of hair growth with gentle, short strokes.
    3. Work in sections; save sensitive areas (belly, legs) for last.
    4. Watch body language: Stop at tail lashing, skin rippling, ears flattening, or growling.
    5. End with treats and praise — even if the session was short.

    Mats: Never cut with scissors — cat skin is paper-thin and tents inside mats. Leave tight mats for a professional groomer.

    Nail Trimming: Step-by-Step

    Most indoor cats need a trim every 2–4 weeks.

    1. Handle paws for several days first (treat and release) — don’t clip yet.
    2. Identify the quick: the pink triangle inside light nails. On dark nails, trim only the hooked tip.
    3. Clip at 45 degrees, only the curved tip (1–2mm past the hook).
    4. You don’t have to do all ten at once — 2–3 per session is fine.
    5. If you nick the quick: apply styptic powder, give a treat, try again another day.

    Bathing: When and How

    Most cats never need a full bath. Bathe only for: sticky/toxic substances, vet-prescribed medicated shampoo, or elderly/obese cats who can’t groom.

    1. Prepare everything first: shampoo, towels, treats, non-slip mat.
    2. Use 2–3 inches of lukewarm water. Avoid running water/sprayers — use a cup.
    3. Wet body (not head), lather, rinse thoroughly. Clean face with damp cloth only.
    4. Dry by blotting with microfiber towel. Keep in warm room until dry.

    Never: dunk your cat, use essential oils (tea tree, eucalyptus, citrus are toxic to cats), or bathe a highly stressed cat.

    Handling Difficult Cats

    • Desensitize gradually — tiny steps, each paired with rewards.
    • Keep sessions short: two good minutes beat ten miserable ones.
    • Try the “burrito”: wrap in towel with one paw exposed.
    • Use a lick mat with purée as a distraction.
    • Know when to outsource — no shame in using a professional groomer.

    Grooming Schedule Cheat Sheet

    • Daily: Brush long-haired cats.
    • Weekly: Brush short/medium-haired cats; check ears and eyes.
    • Every 2–4 weeks: Trim nails.
    • As needed: Baths (rarely); dental care several times weekly.

    Conclusion

    A few minutes of brushing weekly, a calm nail trim every few weeks, and the rare bath will keep your cat comfortable and give you early warning of health issues. Start slow, reward generously, and respect your cat’s limits. Combine your grooming routine with good litter box habits and your cat will stay clean from head to tail.

    Disclaimer: This article is for general informational purposes only and is not veterinary advice. Consult a licensed veterinarian if your cat shows signs of illness.

  • Cat Litter Box Training: Complete Guide for New Cat Owners

    Cat Litter Box Training: Complete Guide for New Cat Owners

    Bringing a new cat home is one of life’s great joys. The good news: cats are naturally clean animals with a strong instinct to bury their waste, so most kittens take to a litter box with minimal coaching. To keep your new cat healthy overall, also check out our guide to grooming your cat at home for brushing, nail trimming, and bathing tips. This guide covers choosing litter and boxes, placement, training steps, troubleshooting, and when a litter issue is actually a vet visit in disguise.

    Choosing the Right Litter Box

    Size Matters More Than Style

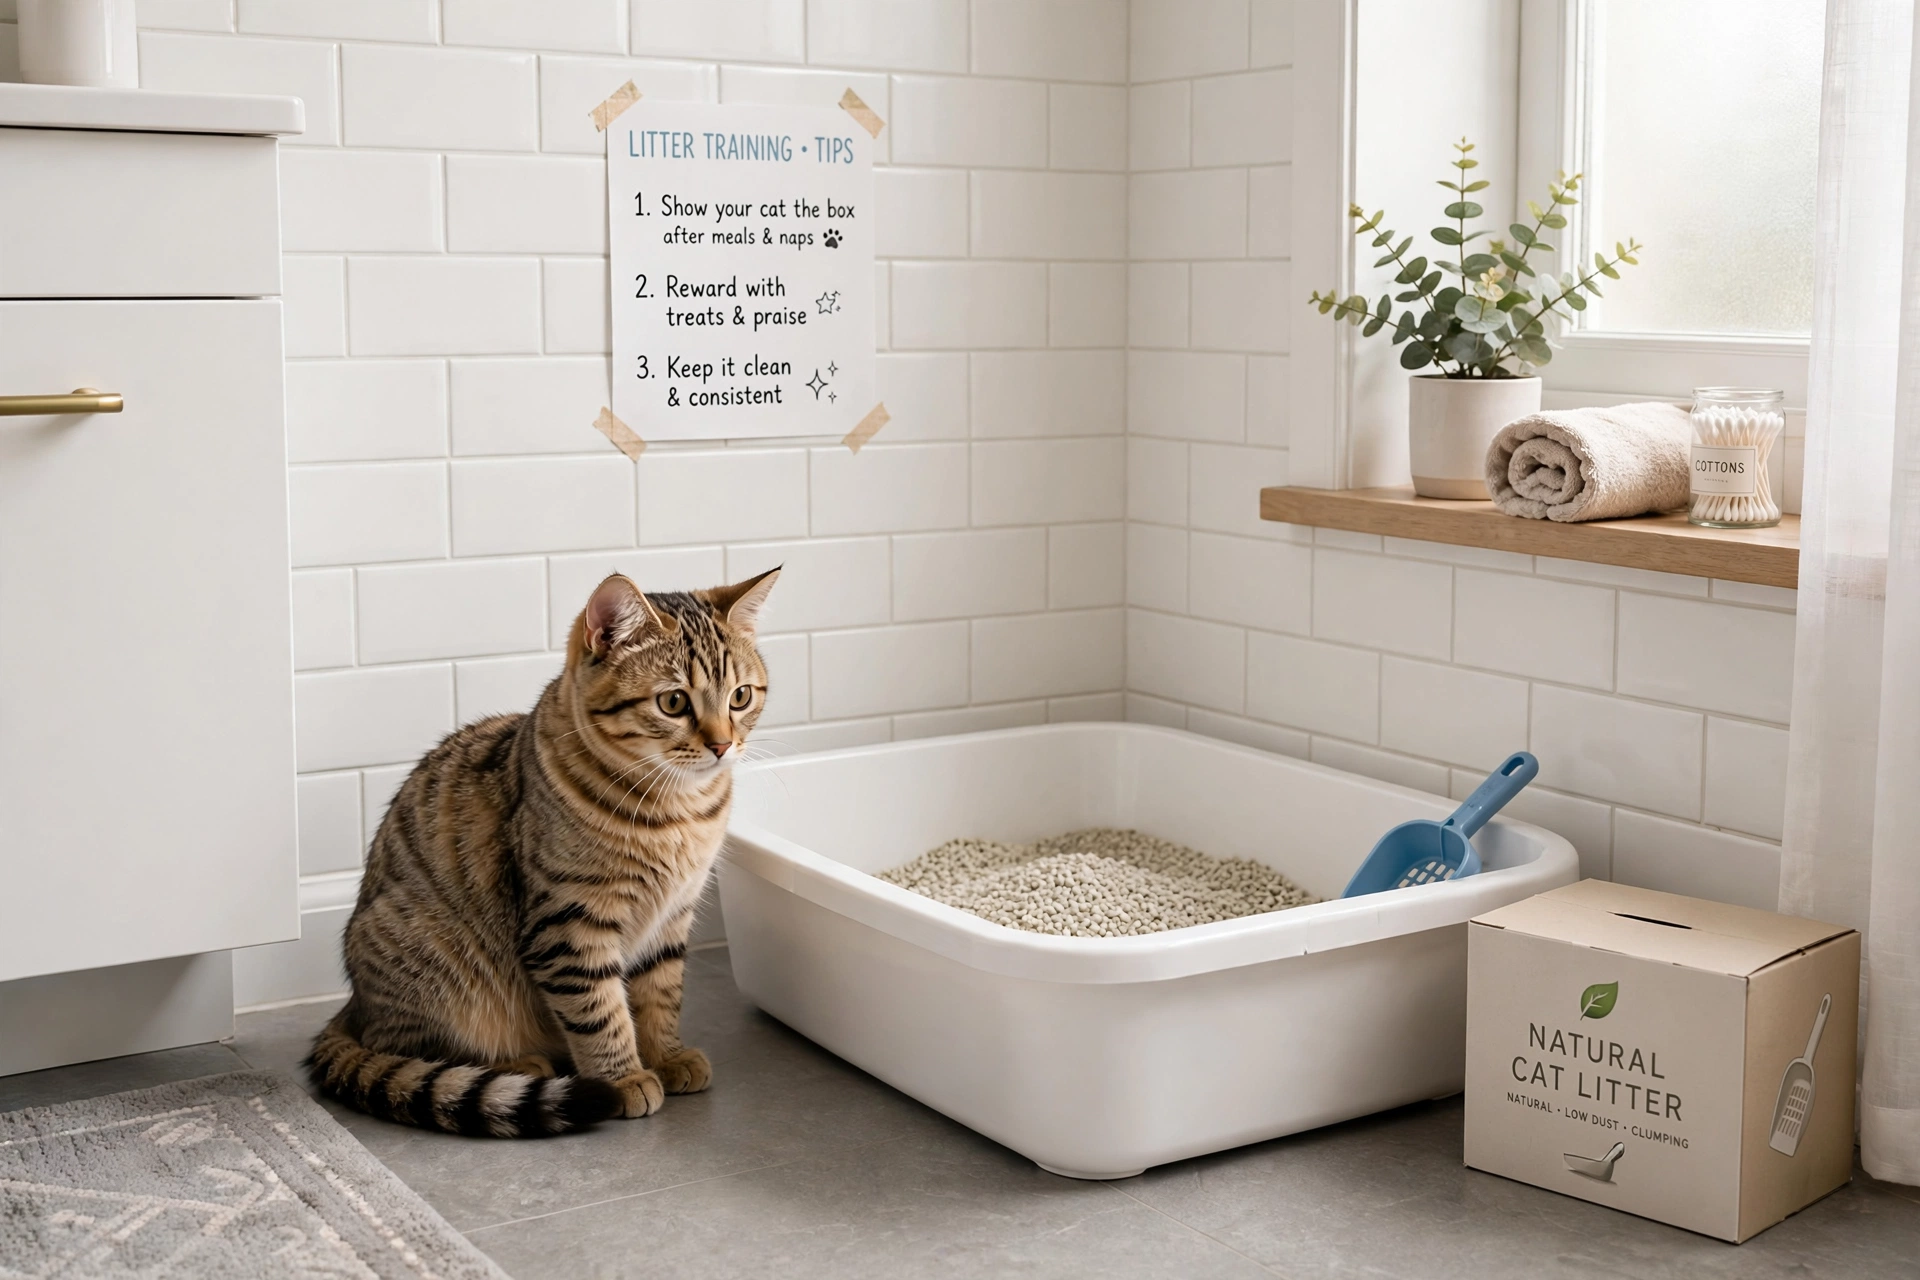
    Your cat should be able to turn around comfortably. The box should be at least 1.5x the length of your cat — for most adults, 22–24 inches long. Large, low-sided storage containers often work better than fancy pet-store boxes.

    Open vs. Covered Boxes

    Start with an open box. Covered boxes trap smells and make cats feel cornered. If odor is a concern, scoop more often — not a lid.

    Choosing the Right Cat Litter

    • Clumping clay: Most popular. Easy to scoop, good odor control. Keep 3–4 inches deep.
    • Silica gel crystals: Excellent odor absorption, but the texture bothers some cats.
    • Natural/biodegradable: Corn, wheat, walnut, pine, or paper. Good for kittens (avoid clumping clay under 4 months — ingested clumps can cause blockages).
    • Scented vs. unscented: Choose unscented. Perfume can repel cats.

    Where to Put the Litter Box

    • Quiet but accessible — not next to the washing machine or a slamming door.
    • One per floor in multi-story homes.
    • Away from food and water — cats avoid eliminating near food.
    • The n+1 rule: one box per cat, plus one extra. Two cats? Three boxes.

    Training Steps: Kittens

    1. Show, don’t force: Place her in the box to sniff and explore.
    2. Time it right: After meals, naps, and play — carry her to the box.
    3. Praise calmly when she uses it.
    4. Handle accidents neutrally: Clean with enzymatic cleaner. Never punish.
    5. Keep it clean: Scoop daily (twice is better).

    Troubleshooting Common Problems

    Poops outside but pees inside

    Box may be too small or not clean enough. Add a second box nearby.

    Suddenly stopped using the box

    Vet visit first. UTIs, bladder stones, kidney disease, arthritis, and constipation are common medical causes. Rule out health issues before assuming behavioral.

    Goes right next to the box

    Usually too dirty, too small, or sides too high. Try a larger box with lower sides.

    Multi-cat conflicts

    Add boxes in different rooms so no cat can guard all of them.

    Litter Box Hygiene Schedule

    • Daily: Scoop solids and clumps.
    • Every 2–4 weeks: Empty completely, scrub with mild soap, refill.
    • Yearly: Replace plastic boxes (plastic absorbs odor over time).

    When to Call the Veterinarian

    • Straining to urinate, crying in the box, or tiny amounts
    • Blood in urine or stool
    • Sudden avoidance of a previously accepted box

    Male cats who strain without producing urine need emergency care — a blocked urethra can be fatal within 24–48 hours.

    Conclusion

    A big, clean, unscented box in a quiet spot, plus patience. Most kittens master it within days. Stay consistent with scooping, never punish accidents, and treat sudden changes as a possible health signal. Pair good litter habits with the brushing and grooming basics to keep your cat clean from head to tail.

    Disclaimer: This article is for general informational purposes only and is not veterinary advice. Consult a licensed veterinarian if your cat shows signs of illness.

  • 10 Signs Your Dog Needs a Vet Visit

    10 Signs Your Dog Needs a Vet Visit

    Dogs can’t tell us when something’s wrong — but they do communicate, constantly. A dog who skips breakfast, drinks water obsessively, or suddenly won’t climb the stairs is telling you something important. This guide covers the ten warning signs every dog owner should know, with clear guidance on what’s an emergency and what can wait.

    1. Sudden Loss of Appetite

    A single skipped meal often means nothing. But appetite loss lasting more than 24 hours (12 hours in a puppy) warrants a vet call. Urgent: refusal to eat with vomiting, lethargy, or a swollen hard abdomen in deep-chested breeds (possible bloat — a surgical emergency). For nutrition fundamentals, see how to choose the right dog food.

    2. Vomiting or Diarrhea That Won’t Stop

    Emergency vet for: blood in vomit/stool; repeated vomiting; lasting over 24 hours (12 in puppies); dehydration signs (dry gums, sunken eyes); after possible toxin ingestion. Can wait: single mild episode in an otherwise bright dog — withhold food 8–12 hours, then offer bland chicken and rice. New puppy owner? Our new puppy checklist covers what to expect in the early weeks.

    3. Unusual Lethargy or Weakness

    Concerning lethargy: a playful dog who won’t get up or seems “flat.” Urgent: collapse, inability to stand, pale/white gums (possible internal bleeding). Check gums — healthy ones are bubblegum pink.

    4. Difficulty Breathing or Persistent Coughing

    Emergency: labored breathing, gasping, blue/gray gums, sudden severe coughing with distress. Schedule a visit: mild occasional cough lasting more than a few days.

    5. Limping or Difficulty Moving

    Check paws first for thorns, cuts, or torn nails. Urgent: non-weight-bearing lameness, obvious deformity, sudden back-leg paralysis in long-backed breeds (possible disc emergency). Never give human painkillers — ibuprofen and acetaminophen are toxic to dogs.

    6. Skin, Coat, or Ear Changes

    Watch for: excessive scratching/licking, hot spots (need vet treatment), hair loss, new lumps (if growing or bigger than a pea, get it checked), ear head-shaking or yeasty smell (ear infections are painful and common).

    7. Excessive Thirst or Urination

    Classic early signs of diabetes, kidney disease, Cushing’s, or UTI. Urgent: straining to urinate with little output in male dogs — possible urinary blockage, life-threatening within 24 hours.

    8. Eye Problems

    Take seriously: squinting, redness/discharge, cloudiness, bulging eye, sudden blindness. Eye issues should be seen the same day — hours matter. Never use old or human eye drops without vet direction.

    9. Behavioral Changes

    Sudden growling when touched (pain), hiding, loss of interest in play, new anxiety. Not usually emergencies, but never “just old age” until medical causes are ruled out — pain is the great imitator.

    10. Unexplained Weight Loss or Gain

    Weigh monthly — gradual changes are invisible day to day. Unexplained loss can signal diabetes, parasites, organ disease, or cancer. Learn body-condition scoring: feel ribs with light pressure, look for a waist from above.

    Emergency vs. Routine: Quick Reference

    Emergency now: difficulty breathing; blue/white gums; collapse; seizures over 2 minutes; bloated hard abdomen; uncontrolled bleeding; suspected poisoning; urinary blockage; heatstroke signs.

    Same day: repeated vomiting/diarrhea; not eating 24+ hours; eye squinting; hot spots; non-weight-bearing limp.

    Within days: mild intermittent limp; increased thirst; new lumps; gradual weight changes; persistent mild cough.

    What to Do in an Emergency

    1. Stay calm. Your dog reads your panic.
    2. Call ahead to your vet or emergency clinic.
    3. Save the ASPCA Poison Control number now: (888) 426-4435.
    4. Don’t improvise medically — no human painkillers.

    Conclusion

    You don’t need to diagnose your dog — you need to notice when something is different and act promptly. Trust your instincts. An unnecessary vet visit is always better than a necessary one that came too late.

    Disclaimer: This article is for general informational purposes only and is not veterinary advice. Contact your veterinarian promptly if your dog shows warning signs. In emergencies, seek immediate care.

  • How to Choose the Right Dog Food: Complete Nutrition Guide

    How to Choose the Right Dog Food: Complete Nutrition Guide

    Walk down any pet store aisle and you’ll face a wall of dog food bags — grain-free, raw-coated, limited-ingredient — each claiming to be the healthiest choice. Here’s the reassuring truth: choosing a good dog food is simpler than the industry wants you to believe. This guide gives you the foundation to shop with confidence.

    Understanding AAFCO: The Nutritional Safety Net

    The Association of American Feed Control Officials (AAFCO) sets nutrient profiles defining “complete and balanced” dog food in the US. Look for the AAFCO statement on the bag. There are two ways food earns it: formulation (recipe calculated to meet profiles) and feeding trials (actually fed to dogs — the stronger standard).

    Life-stage designations: “growth” (puppies), “adult maintenance,” “all life stages.” For most dogs, an AAFCO-compliant food matched to the correct life stage is the single most important thing on the label.

    How to Read a Dog Food Label

    The Ingredient List

    • Look for named animal protein (chicken, beef, salmon) in the first few ingredients.
    • Watch for ingredient splitting: “peas, pea starch, pea protein” disguises that peas dominate the formula.
    • Ignore romance copy: “holistic,” “ancestral,” “human-grade” have no regulated nutritional meaning.

    Calorie Content

    Look for the kcal/cup statement — foods vary enormously (280 to 500+ kcal/cup). Always portion by calories, not volume.

    Matching Food to Life Stage

    Puppies

    Feed “growth” or “all life stages” formula. Large-breed puppies (expected adult weight over 50 lbs) need large-breed puppy formula specifically — it controls calcium to prevent developmental orthopedic disease. Bringing home a new puppy? Our new puppy checklist covers everything else you’ll need beyond food.

    Adult Dogs

    Most healthy adults do well on “adult maintenance.” Adjust portions to maintain ideal body condition rather than chasing a “high-performance” label.

    Senior Dogs

    Around age 7 (large breeds) or 9–10 (small breeds), consider senior formula with joint support and omega-3s.

    Wet vs. Dry Food

    • Dry kibble: Economical, convenient. The “cleans teeth” claim is overstated.
    • Wet food: Higher moisture helps hydration; more palatable for picky eaters.
    • Raw/homemade: Can work but carry risks — bacterial contamination and nutritional incompleteness. Work with a veterinary nutritionist, not a blog recipe.

    Special Dietary Needs

    Food Allergies

    True allergies are less common than marketing suggests. Culprits are usually proteins: beef, dairy, chicken. Diagnosis requires a strict 8–12 week elimination trial supervised by your vet. Note: grain-free diets have been associated with a potential link to dilated cardiomyopathy (DCM).

    Weight Management

    The most common feeding mistake isn’t the wrong brand — it’s feeding too much. Measure with a scale, keep treats under 10% of calories, weigh monthly.

    Common Mistakes to Avoid

    1. Feeding by the bag’s chart alone — adjust to body condition.
    2. Constant food switching — find a good food and stick with it.
    3. Free-feeding — destroys portion control and hides appetite changes.
    4. Over-treating — extras easily add 20–30% more calories.
    5. Ignoring the transition period — switch gradually over 7–10 days.
    6. Poor storage — keep in original bag inside airtight container; don’t buy more than 6 weeks’ supply.

    Conclusion

    Pick an AAFCO-compliant food for the right life stage, from a manufacturer with real nutritional expertise. Feed measured portions, keep treats in check, and let your dog’s body condition — not marketing — be your guide. And if your dog shows worrying symptoms, learn the 10 signs your dog needs a vet visit.

    Disclaimer: This article is for general informational purposes only and is not veterinary advice. Consult your veterinarian before making significant diet changes.

  • New Puppy Checklist: Everything You Need Before Bringing Your Puppy Home

    New Puppy Checklist: Everything You Need Before Bringing Your Puppy Home

    Bringing a new puppy home is one of life’s happiest moments — and one of its most hectic. This comprehensive checklist covers everything you need: essential supplies, how to puppy-proof your home, what to expect at the first vet visit, training basics, and a feeding schedule that sets your puppy up for healthy growth. Still choosing your breed? See our best dog breeds for first-time owners in the US.

    Essential Puppy Supplies

    Crate and Bedding

    A crate gives your puppy a safe, den-like space and makes house training dramatically easier. Choose a crate large enough to stand up, turn around, and lie down — with a divider panel so it grows with your puppy. Use washable bedding.

    Food and Water Bowls

    Stainless steel bowls are best — durable, dishwasher-safe, and hygienic. Buy the same food your puppy has been eating for the first 1–2 weeks to avoid stomach upset.

    Collar, Leash, and ID Tag

    Attach an ID tag with your phone number before you even leave to pick up your puppy. Microchipping is essential too. Use a standard 4–6 foot leash — avoid retractable leashes for puppies.

    Toys and Chews

    • Rubber toys (like Kongs) — stuff with treats for mental stimulation
    • Rope toys — supervise and discard when threads unravel
    • Puppy teething toys — some can be frozen for sore gums

    Cleaning Supplies

    An enzymatic cleaner is non-negotiable — it breaks down odor proteins that tell your puppy “this is the bathroom spot.”

    Puppy-Proofing Your Home

    • Electrical cords: Secure with covers — chewing cords can be fatal.
    • Houseplants: Move toxic ones (pothos, lilies, sago palm).
    • Kitchen: Childproof latches on cabinets; locking-lid trash can.
    • Garage: Lock up antifreeze, pesticides — antifreeze tastes sweet and is lethal.

    Toxic foods to memorize: chocolate, grapes/raisins, onions/garlic, xylitol (sugar-free gum), macadamia nuts, alcohol, cooked bones.

    The First Vet Visit

    Schedule within 2–3 days of bringing your puppy home. Bring health and vaccination records. Also learn the 10 signs your dog needs a vet visit so you know when to call between checkups.

    Vaccination Schedule

    • 6–8 weeks: First DHPP combo
    • 10–12 weeks: Second DHPP; bordetella if recommended
    • 14–16 weeks: Third DHPP; rabies (required by law in most states)

    Until vaccinations are complete (~16 weeks), avoid dog parks and heavy dog-traffic areas.

    Training Basics

    House Training

    Take your puppy out first thing in the morning, after meals, after naps, and every 1–2 hours. Young puppies can “hold it” about one hour per month of age. Reward immediately with praise and treats. Never punish accidents.

    Crate Training

    Introduce gradually and keep it positive — feed meals inside with the door open first. Never use the crate as punishment.

    Socialization (3–14 weeks)

    Expose your puppy to many positive experiences: different people, gentle children, vaccinated dogs, car rides, various surfaces. Pair new things with treats. Puppy kindergarten classes are excellent.

    Basic Commands

    Start with 5-minute sessions, 2–3 times daily: name recognition, sit, come, down, leave it. Use positive reinforcement only.

    Feeding Schedule

    Three meals a day until ~6 months, then two. Feed at consistent times. Choose food labeled for puppies or “all life stages” with the AAFCO statement. Large-breed puppies need large-breed puppy formula. For detailed nutrition guidance, see how to choose the right dog food.

    First-Year Budget

    • Veterinary care: $200–$500 (vaccines, spay/neuter) + $300–$600/year preventive
    • Food: $300–$700/year
    • Supplies: $200–$400 initial
    • Training classes: $150–$300
    • Pet insurance: $300–$600/year
    • Emergency fund: Keep $1,000–$2,000 accessible

    Conclusion

    Preparing for a puppy takes effort, but every item on this checklist pays dividends in a happier, healthier dog. Remember: perfection isn’t the goal — patience is.

    Disclaimer: This article is for general informational purposes only and is not veterinary advice. Always consult your veterinarian about your puppy’s specific health needs.

  • Winter Home Maintenance Checklist for US Homeowners

    Winter Home Maintenance Checklist for US Homeowners

    Winter is the season that tests your house. Frozen pipes burst, ice dams tear off gutters, furnaces die on the coldest night of the year, and heating bills spike. The good news: nearly all winter home damage is preventable with a few weekends of maintenance in the fall — and having the right tools on hand makes every job easier. This comprehensive checklist covers everything a US homeowner should do before and during winter.

    Heating System: Your First Priority

    Fall Tune-Up (September–October)

    • Schedule a professional furnace inspection ($80–$150). A technician will clean burners, check the heat exchanger for cracks (a cracked heat exchanger can leak carbon monoxide), and test the ignition.
    • Replace the furnace filter. Check it monthly during heating season.
    • Test the thermostat. Consider upgrading to a programmable thermostat ($100–$250) — saves about 10% on heating annually.

    Carbon Monoxide Safety — Non-Negotiable

    • Install CO detectors on every floor. Test monthly.
    • Never run a generator indoors or in an attached garage.
    • If your CO alarm sounds: get everyone outside immediately, then call 911.

    Plumbing: Preventing Frozen and Burst Pipes

    A burst pipe can release 200+ gallons per day. The average insurance claim is around $15,000. Prevention costs almost nothing.

    Before the First Freeze

    • Insulate exposed pipes in basements, crawl spaces, attics, and garages. Foam sleeves cost ~$0.50/foot.
    • Disconnect and drain outdoor hoses. Shut off interior valves to exterior faucets.
    • Know where your main water shutoff is — every adult in the house should know.

    During Extreme Cold (Below 20°F)

    • Let faucets drip — a pencil-thin stream keeps water moving.
    • Open cabinet doors under sinks on exterior walls.
    • Keep thermostat at 65°F or above, even when away.

    Roof, Gutters, and Attic: Stopping Ice Dams

    Fall Inspection

    • Clean gutters thoroughly. Clogged gutters are the #1 contributor to ice dams.
    • Check attic insulation (R-38 to R-60) and ventilation — this is the real ice dam prevention.
    • Trim overhanging branches within 6 feet of the roofline.

    If Ice Dams Form

    • Use a roof rake ($40–$60) from the ground after each storm.
    • Don’t chip at ice with tools — you’ll damage shingles.

    Windows, Doors, and Insulation

    • Check weatherstripping on exterior doors ($5–$15 per door).
    • Caulk gaps around window frames where you feel drafts.
    • Reverse ceiling fans to clockwise at low speed to push warm air down.
    • Close the fireplace damper when not in use.

    Emergency Preparedness

    • Flashlights + batteries, battery radio, 3 days of water (1 gallon/person/day), non-perishable food, warm blankets, phone chargers.
    • Generator safety: Test monthly. Never run indoors or in garage — CO poisoning kills every winter.
    • Car kit: Blanket, snacks, flashlight, shovel, sand for traction, keep tank half full.

    Month-by-Month Quick Reference

    September–October

    • Furnace tune-up, clean gutters, disconnect hoses, seal drafts, test detectors, stock ice melt.

    November

    • Insulate pipes, install storm windows, reverse fans, assemble emergency kit.

    December–February

    • Check furnace filter monthly, roof-rake after snowfalls, drip faucets in extreme cold.

    Conclusion

    A $100 furnace tune-up prevents a $500 emergency call. Ten dollars of pipe insulation prevents a $15,000 water damage claim. Work through this checklist each fall, and winter becomes something you enjoy — not something you survive. Keep your essential homeowner tools ready for quick winter repairs.

    Safety note: Furnace, electrical, and roofing work can be dangerous — hire licensed professionals for anything beyond basic maintenance.

  • How to Unclog a Drain Without Calling a Plumber

    How to Unclog a Drain Without Calling a Plumber

    A slow or clogged drain is one of the most common household headaches — and one of the most fixable. Before you spend $150–$300 on a plumber, know this: the vast majority of drain clogs can be cleared with basic tools and methods that cost under $30. This guide covers kitchen sinks, bathroom sinks, tubs, and shower drains, walking you from the gentlest fixes to the heavy-duty options, plus how to keep drains clear in the first place.

    First: Identify What Kind of Clog You Have

    • Kitchen sink: Usually grease, food particles, and soap scum.
    • Bathroom sink: Almost always hair mixed with soap scum and toothpaste.
    • Tub and shower: Hair plus soap residue, forming a dense mat.

    Warning: If multiple drains are slow at the same time, the problem may be in the main sewer line — that’s a plumber job.

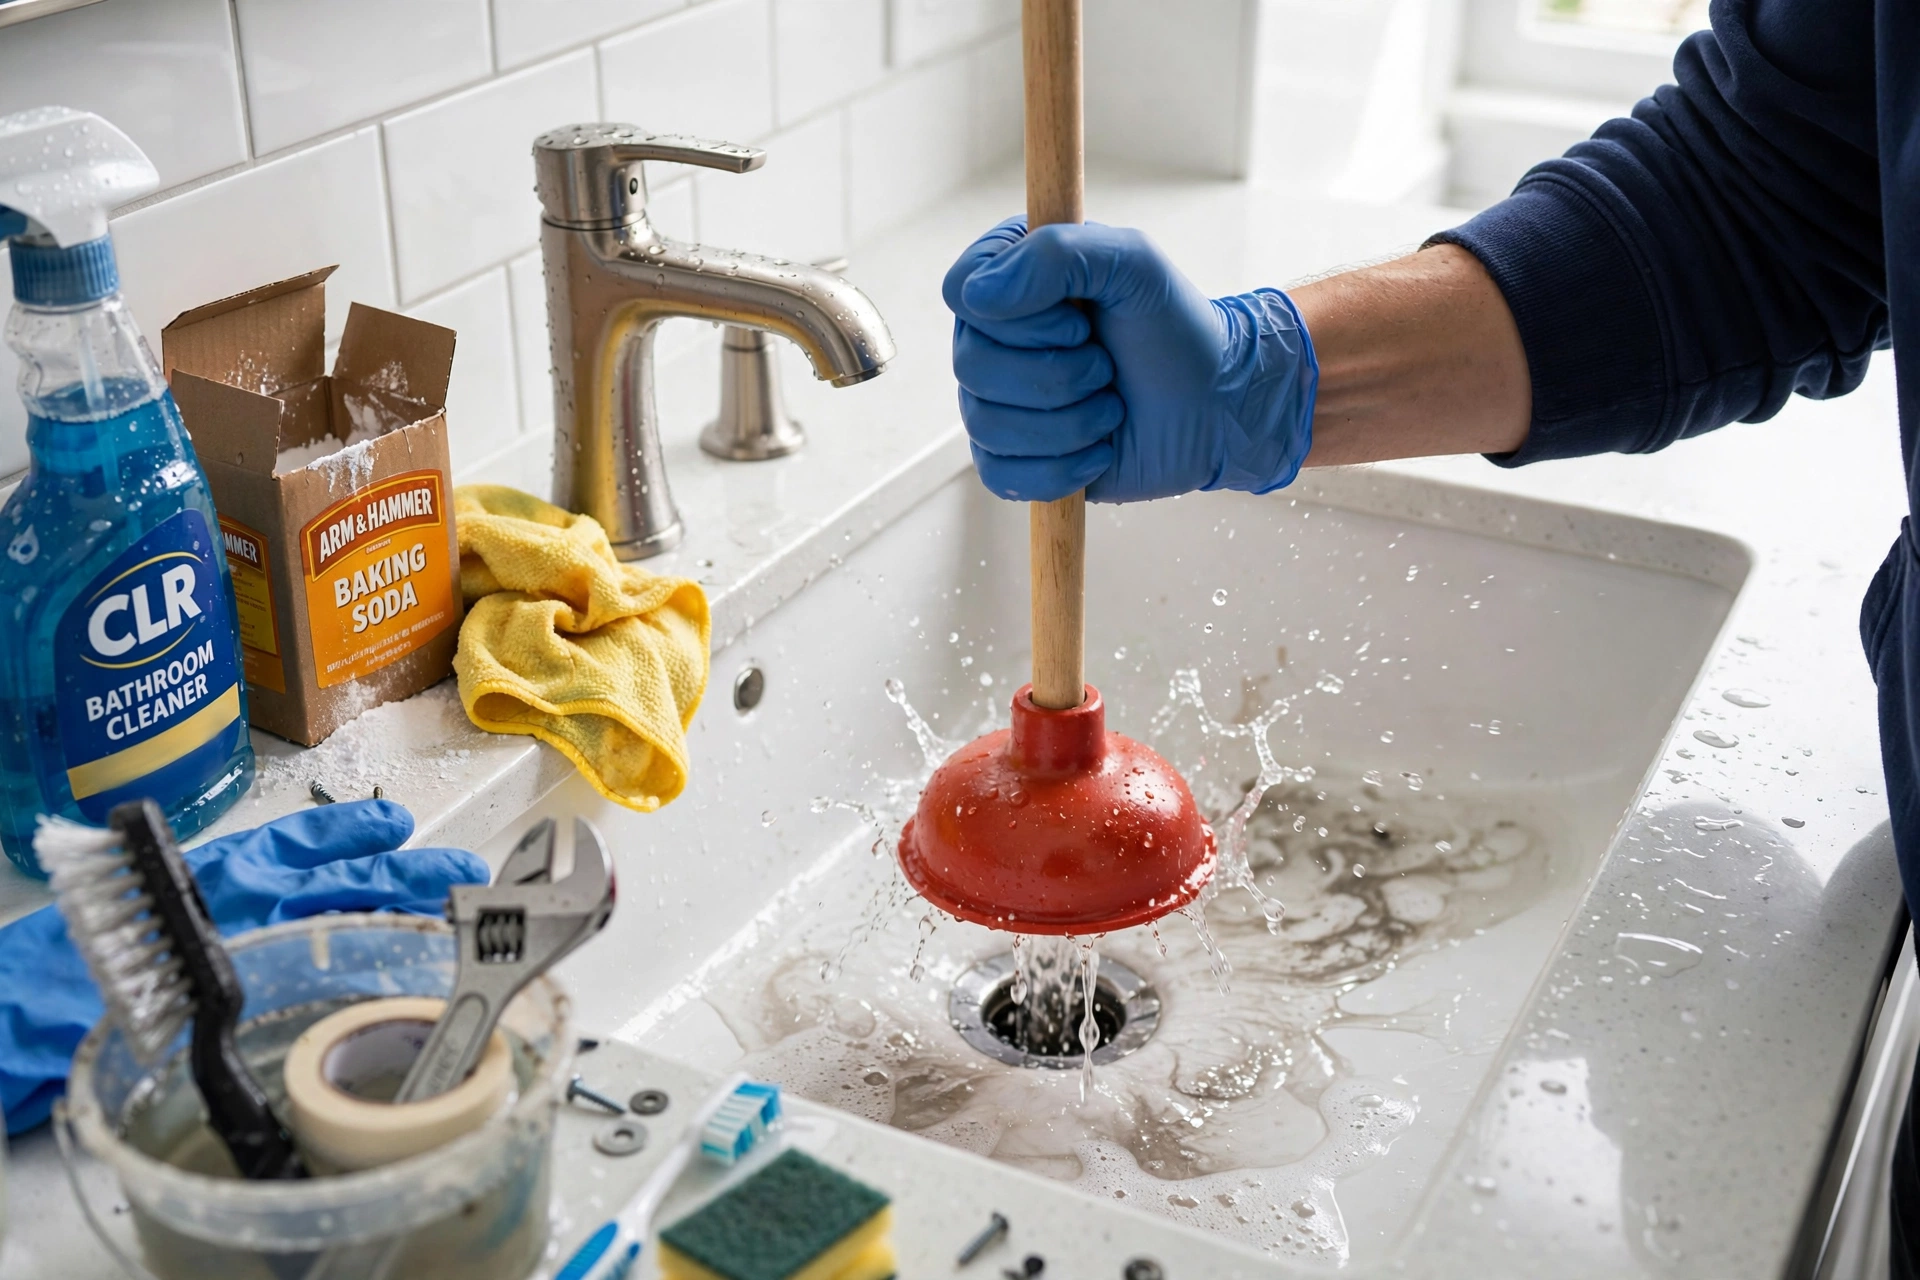
    Method 1: The Plunger (Yes, Really)

    Use the Right Plunger

    • Cup plunger (flat bottom): for sinks, tubs, and showers.
    • Flange plunger (with fold-out flap): for toilets.

    Proper Plunging Technique

    1. Fill the sink or tub with 2–3 inches of water.
    2. Plug the other drain or overflow hole with a wet rag.
    3. Place the plunger firmly over the drain, creating a seal.
    4. Push down firmly, then pull up sharply — 10–15 vigorous strokes.

    Method 2: Remove the Stopper and Pull Out the Gunk

    For bathroom sinks and tubs, use a drain snake (hair snake) — a cheap plastic strip with barbs ($3–$5). Push it down, twist, and pull up slowly. A $4 plastic hair snake is the highest-ROI tool in home plumbing.

    Method 3: Baking Soda and Vinegar

    1. Pour 1/2 cup of baking soda down the drain.
    2. Follow with 1/2 cup of white vinegar.
    3. Cover the drain and let it fizz for 15–20 minutes.
    4. Flush with very hot (not boiling) tap water.

    Note: This loosens light soap scum but won’t dissolve a solid hair clog. Do NOT use boiling water in PVC pipes — it can soften them.

    Method 4: Dish Soap and Hot Water (Kitchen Sinks)

    1. Squirt 1/4 cup of grease-cutting dish soap into the drain.
    2. Let it sit for 5 minutes.
    3. Run the hottest tap water for 2–3 minutes.

    Method 5: The Drain Auger

    Feed the auger cable into the drain while turning the crank clockwise. When you feel resistance, keep cranking. Slowly retract — the clog should come out with it. A basic 25-foot auger costs $25–$35.

    Method 6: Chemical Drain Cleaners — Use With Caution

    • Never mix chemical cleaners. Mixing can create lethal chlorine gas.
    • Wear gloves and eye protection.
    • Never use a plunger after pouring chemicals.
    • Avoid with septic systems.

    Enzyme-based cleaners (like Bio-Clean) are the safer alternative for monthly prevention.

    What NOT to Do

    • Don’t pour grease down the drain. Ever.
    • Don’t flush “flushable” wipes. They don’t break down.
    • Don’t ignore a recurring clog. It signals a structural problem.

    Prevention

    • Mesh drain catchers in every shower and tub drain.
    • Scrape plates into trash before rinsing.
    • Monthly: baking soda + hot water down each drain.

    When to Call a Plumber

    • Multiple drains slow simultaneously
    • Sewage smell or backup
    • Clog returns within days
    • Water backs up into tub when toilet flushes

    Conclusion

    Start with the plunger, graduate to the hair snake, and keep a $30 auger in the toolbox. You’ll handle 90% of drain problems yourself. Dealing with drips rather than clogs? See how to fix a leaky faucet step by step.

    Safety note: Chemical drain cleaners can cause serious burns. Always follow safety precautions. Consult a licensed plumber if unsure.

  • Bathroom Renovation on a Budget: Complete Guide

    Bathroom Renovation on a Budget: Complete Guide

    A bathroom renovation doesn’t have to drain your savings. While the average bathroom remodel in the United States costs between $10,000 and $25,000, smart planning and strategic choices can bring that number down to $3,000–$8,000 for a small to mid-sized bathroom — without making it look cheap. This guide walks you through every step: setting a realistic budget, deciding where to save and where to splurge, figuring out what you can safely DIY, and building a timeline that keeps the project on track.

    Step 1: Define Your Scope and Set a Realistic Budget

    Before buying a single tile, decide what kind of renovation you’re doing. Bathroom remodels fall into three tiers, and knowing which one fits your budget prevents the most common (and most expensive) mistake: scope creep.

    The Three Renovation Tiers

    • Cosmetic refresh ($1,500–$4,000): New paint, updated fixtures, new mirror, new lighting, recaulking, new shower curtain or glass. No plumbing or layout changes.
    • Mid-range remodel ($5,000–$12,000): New vanity, toilet, flooring, tile surround, and lighting. Plumbing stays roughly where it is. This is the sweet spot for most budget renovations.
    • Full gut renovation ($15,000–$30,000+): Everything comes out. Reserve this for bathrooms with serious damage or when reconfiguring the space entirely.

    Build Your Budget Line by Line

    For a typical 5×8-foot hall bathroom, here’s a realistic mid-range budget breakdown:

    • Demolition and disposal: $300–$600
    • Plumbing (fixtures stay in place): $800–$1,500
    • Electrical (new lighting, GFCI outlets): $400–$800
    • Flooring (materials + install): $500–$1,200
    • Shower/tub surround tile: $800–$2,000
    • Vanity and top: $400–$1,000
    • Toilet: $150–$350
    • Faucets and shower fixtures: $200–$600 — swapping a faucet is a beginner-friendly DIY; see how to fix a leaky faucet step by step.
    • Paint and supplies: $100–$200
    • Mirror, lighting, accessories: $200–$500
    • Permits: $100–$500
    • Contingency (15–20%): $750–$1,500

    Where to Save vs. Where to Splurge

    Save Money Here

    • Tile: Basic white subway tile costs $2–$4 per square foot and looks timeless. Save expensive accent tile for a small feature.
    • Vanity: A stock vanity ($250–$500) looks nearly identical to a $1,500 custom piece once installed.
    • Toilet: A $180 toilet flushes just as well as a $600 designer model.
    • Paint: The cheapest transformation — a gallon of quality bathroom paint ($40–$60) completely changes the room. For technique, see how to paint a room like a professional.
    • Mirror: A large frameless mirror ($50–$100) makes a small bathroom feel twice as big.

    Splurge (Wisely) Here

    • Shower valve and waterproofing: Buy a quality valve from a major brand and use proper waterproofing behind the tile. A $200 valve today prevents a $3,000 leak repair later.
    • Exhaust fan: A quiet, properly sized fan prevents mold — the number one bathroom enemy.
    • Labor for tile and plumbing: A bad tile job fails within years; a good one lasts decades.

    DIY vs. Hire a Pro

    Safe DIY Tasks

    • Demolition, painting, installing vanity/toilet/mirror, caulking and grouting, installing accessories.

    Hire a Licensed Pro For

    • Moving drain lines, electrical work beyond swapping fixtures, shower tile and waterproofing, anything requiring a permit.

    Smart Shopping Strategies

    • Buy floor models and open-box items for 30–50% off.
    • Check Habitat for Humanity ReStores for donated materials at deep discounts.
    • Keep the plumbing where it is — moving a toilet can cost $1,500–$3,000.
    • Refinish instead of replace — reglazing a tub costs $300–$600 vs $1,500+ to replace.

    Conclusion

    A budget bathroom renovation is a series of smart trade-offs, not sacrifices. Keep the plumbing where it is, spend on what’s behind the walls, save on what’s in front of them, and do the demolition and finishing work yourself.

    Safety note: Plumbing and electrical work must comply with local building codes. When in doubt, hire a licensed professional.

  • How to Paint a Room Like a Professional

    How to Paint a Room Like a Professional

    A fresh coat of paint is the single most cost-effective way to transform a room. For $50 to $150 in materials, you can make a tired space feel brand new — no contractor required. Yet anyone who’s attempted it knows the gap between slapping paint on a wall and achieving that smooth, professional finish. The difference isn’t talent or expensive equipment. It’s preparation, technique, and knowing the mistakes to avoid.

    This guide covers the entire process the way professionals do it: choosing the right paint and tools, prepping the room properly, cutting in and rolling like a pro, avoiding the classic beginner errors, and cleaning up so your tools last for the next project.

    Choosing Your Paint

    Paint Types: Latex vs. Oil-Based

    For interior walls, latex (water-based) paint is the right choice in virtually every situation. It dries quickly (1–2 hours to touch), has low odor, cleans up with soap and water, and resists yellowing over time. Modern latex paints have improved so dramatically that they now rival oil-based paints in durability and finish quality.

    Oil-based (alkyd) paint is still occasionally used for trim and doors because it levels out to an exceptionally smooth, hard finish. However, it takes 6–8 hours to dry, requires mineral spirits for cleanup, has strong fumes (ventilation is essential), and is restricted or banned in some areas due to VOC regulations. For most homeowners painting walls, latex is the answer.

    Understanding Paint Finishes

    The finish (or sheen) affects both appearance and durability. Here’s how to choose:

    • Flat/Matte: No shine. Best for ceilings and low-traffic walls with imperfections, because it hides flaws beautifully. Downside: it’s the hardest to clean — scrubbing can burnish the finish.
    • Eggshell: A soft, subtle sheen. The most popular choice for living rooms and bedrooms. It hides minor imperfections while being washable enough for everyday life.
    • Satin: Slightly more sheen than eggshell. Excellent for kitchens, bathrooms, hallways, and kids’ rooms — areas that need frequent wiping. It’s more durable but shows wall imperfections more than flatter finishes.
    • Semi-gloss: Noticeable shine. Traditionally used for trim, doors, and cabinets because it’s highly durable and easy to clean. Too shiny for large wall areas in most homes.
    • High-gloss: Very shiny and dramatic. Reserved for trim, doors, and furniture. Shows every imperfection, so surface prep must be flawless.

    Rule of thumb: Eggshell or satin for walls, semi-gloss for trim and doors, flat for ceilings.

    Choosing Colors

    • Test before committing. Paint large swatches (at least 2×2 feet) on the wall or buy sample pints and paint poster boards you can move around. Observe the color in morning, afternoon, and evening light — it changes dramatically.
    • Consider the room’s orientation. North-facing rooms get cooler, bluer light (warm colors compensate nicely). South-facing rooms get warm light (cooler colors balance it).
    • Go one shade lighter than you think. Color always looks darker and more saturated on a full wall than on a tiny swatch.
    • Coordinate with fixed elements. Flooring, countertops, and large furniture aren’t changing — choose wall colors that complement them.

    How Much Paint to Buy

    One gallon of paint typically covers 350–400 square feet per coat. For a typical 12×12 bedroom with 8-foot ceilings: perimeter is 48 feet × 8 feet = 384 sq ft, minus ~50 for door/window = ~334 sq ft. That’s about 1 gallon per coat, so buy 2 gallons. It’s always better to have a little extra — running out mid-wall creates visible lap marks.

    Tools You’ll Need

    • Rollers: A 9-inch roller frame with 3/8-inch nap covers for smooth walls.
    • Brushes: A 2.5-inch angled sash brush for cutting in and trim work.
    • Paint tray with liner, painter’s tape, drop cloths, extension pole, putty knife and spackle, sandpaper (120-grit), 5-in-1 painter’s tool.

    These cover painting specifically — for a complete DIY toolkit, see our list of 10 essential tools every homeowner should own.

    Prepping the Room (The Step Everyone Skips)

    Professionals spend more time on prep than on painting. This is the real secret to a professional finish.

    1. Clear and Protect

    1. Remove all furniture from the room if possible. For large pieces, move them to the center and cover with drop cloths.
    2. Take down curtains, blinds, outlet covers, switch plates, and vent covers.
    3. Lay drop cloths over the entire floor, tucking edges under baseboards.

    2. Clean the Walls

    Wipe down walls with a damp sponge and mild detergent. For kitchens or smoky rooms, use TSP substitute. Let walls dry completely before painting.

    3. Repair Imperfections

    1. Fill nail holes and small dents with lightweight spackle using a putty knife.
    2. Once dry, sand smooth with 120-grit sandpaper.
    3. Wipe away sanding dust with a damp cloth.

    4. Caulk Gaps

    Run a thin bead of paintable caulk along gaps between trim and walls. This single step dramatically improves the finished look.

    Painting Technique: Cutting In and Rolling

    Cutting In

    1. Load your angled brush about a third of the way up the bristles.
    2. Start about an inch away from the edge, then sweep the brush toward the edge in a smooth stroke.
    3. Cut in a 2–3 inch band around all edges: ceiling line, baseboards, door/window trim, and corners.

    Rolling the Walls

    1. Load the roller until evenly saturated but not dripping.
    2. Roll in a “W” or “M” pattern to distribute paint, then fill in with parallel strokes.
    3. Always roll from dry areas into wet areas (“maintain a wet edge”).
    4. Work top to bottom, completing one wall before moving to the next.

    Order of Operations

    1. Ceiling first — drips fall down, not up.
    2. Walls second — cut in, then roll.
    3. Trim, doors, and baseboards last.

    Common Mistakes to Avoid

    1. Skipping prep work. Prep determines 80% of the outcome.
    2. Using cheap brushes and rollers. A $12 brush outperforms a $3 brush enormously.
    3. Not buying enough paint. Buy extra for touch-ups.
    4. Overloading the brush or roller. Multiple thin coats beat one thick coat.
    5. Letting the cut-in dry before rolling. This creates visible “hatbanding.”

    Conclusion

    Painting a room like a professional comes down to three things: thorough preparation, quality materials, and patient technique. Take your time with prep, invest in decent brushes and rollers, maintain a wet edge while you work, and don’t skip the second coat. Tackling a bathroom? Our bathroom renovation on a budget guide covers paint, fixtures, and more.

    Disclaimer: This guide is for informational purposes only. When painting, ensure adequate ventilation and keep paint products away from children and pets. If your home was built before 1978, test for lead paint before sanding or scraping. Always follow the paint manufacturer’s safety instructions.